 少有人走的路
(一)nx端的使用方式
(二)使用vs来调试运行时代码
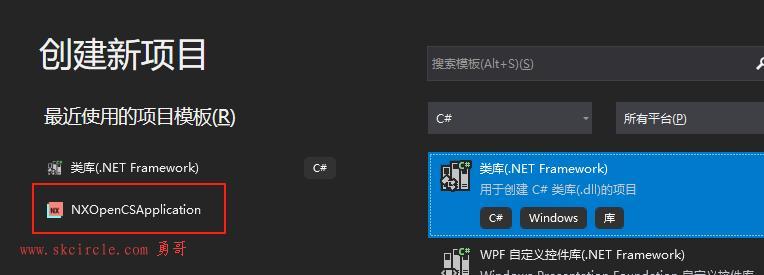
创建.net framework类库程序。
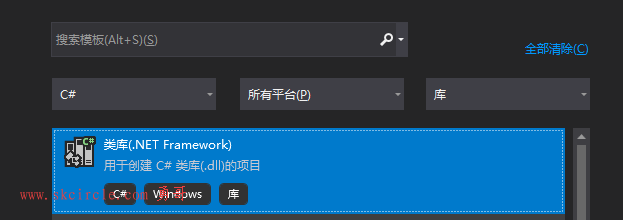
nx也提供了vs2019的一个开发环境插件,安装后也可以使用nxopen的模板来创建项目。
这个插件在本文的下载里提供了。
C#代码:
using System;
using NXOpen;
public class UserBehavior : BehaviorDef
{
    MCDSignal m_Trigger; // m_Trigger is the trigger value MCDSignal m_Times;
    MCDSignal m_Times;                      // m_Timers is the counter for trigger
    bool bFlag = false; public override void Define(IDefinitionContext access)
    {
        // Insert definition code here
        // connect the m_Trigger and m_Timers to MCD object access.Connect("Trigger", out m_Trigger); access.Connect("Times", out m_Times);
        access.Connect("Trigger", out m_Trigger);
        access.Connect("Times", out m_Times);

    }
    public override void Start(IRuntimeContext context)
    {
        // Insert start up code here
    }
    public override void Stop(IRuntimeContext context)
    {
        // Insert stopping code here
    }
    public override void Step(IRuntimeContext context, double dt)
    {
        // NXOPEN APIs can not be called in Step function since Step is running in the worker thread.
        // only MCD runtime APIs can be called in the Step function
        // Insert simulation step code here
        if (!bFlag & m_Trigger.BoolValue)
        {
            m_Times.IntValue++;
            bFlag = true;
        }
        if (m_Trigger.BoolValue == false)
        {
            bFlag = false;
        }
    }
    public override void Refresh(IRuntimeContext context)
    {
        // Insert simulation refreshing code here. This is called when it is safe // to read and change runtime variables outside of the main control loop. } public override void Repaint()
        {
            // Insert simulation repainting code here. This is where you use the data
            // taken from the runtime to update the display.
        }
    }

    public override void Repaint()
    {
        // Insert simulation repainting code here. This is where you use the data
        // taken from the runtime to update the display.
    }

}
引用dll
在勇哥的电脑上,dll的位置在:C:\Program Files\Siemens\NX2412\NXBIN\managed
实在找不到的人,可以装个everything搜索一下位置。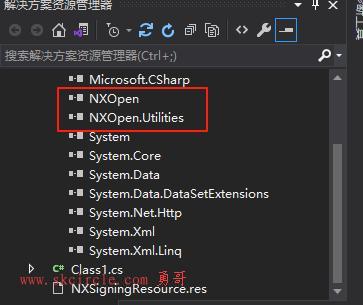
接下来很重要一点,要对编译后的dll做nx的签名,否则你无法在nx中应用这个dll。
在项目->属性中,添加下面的签名事件。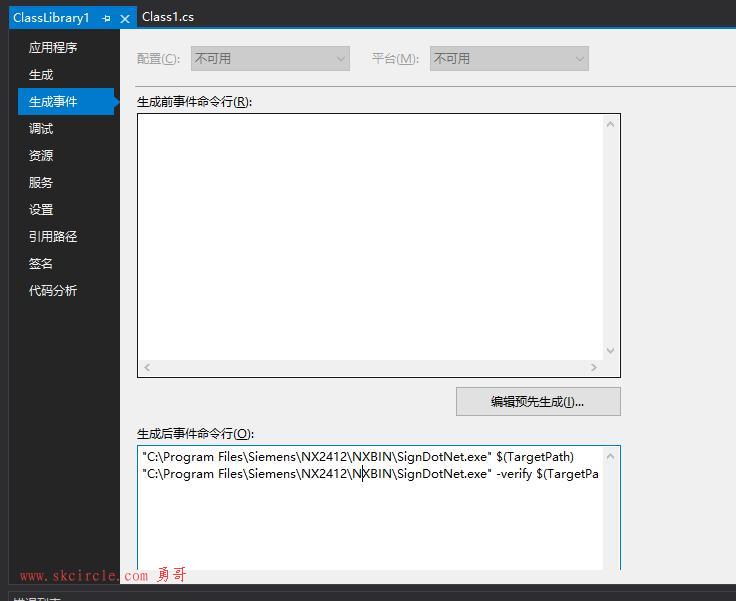
注意把路径替换成你自己的。
"C:\Program Files\Siemens\NX2412\NXBIN\SignDotNet.exe" $(TargetPath)
"C:\Program Files\Siemens\NX2412\NXBIN\SignDotNet.exe" -verify $(TargetPath)
编译吧,如果成功了,最好看下签名是否成功了。
使用下面的命令。
看如下的信息则表示成功了。
然后在nx这边使用这个dll。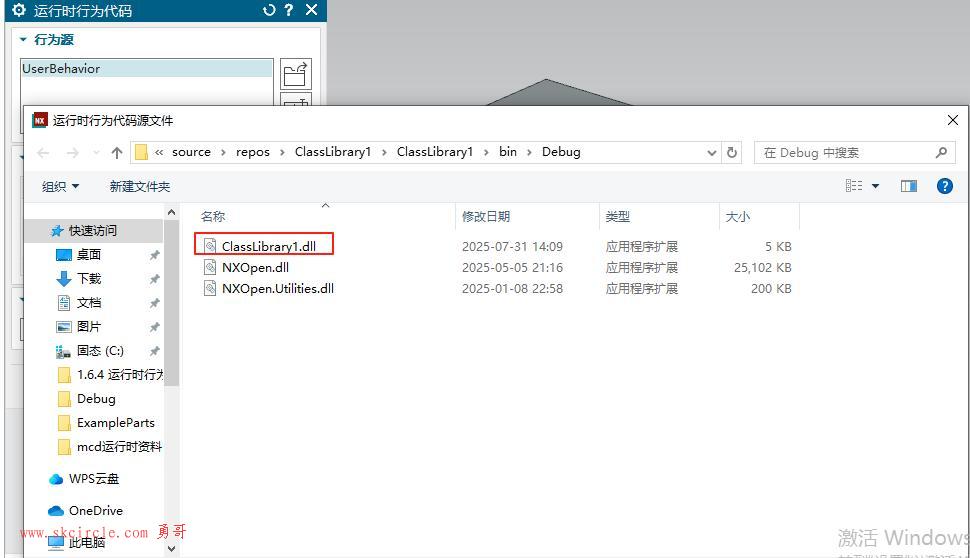
如果C#脚本没问题,就可以看到两个值,它是由下面代码里指定的:
access.Connect("Trigger", out m_Trigger);
access.Connect("Times", out m_Times);
但是名称这个还是需要手工指定的。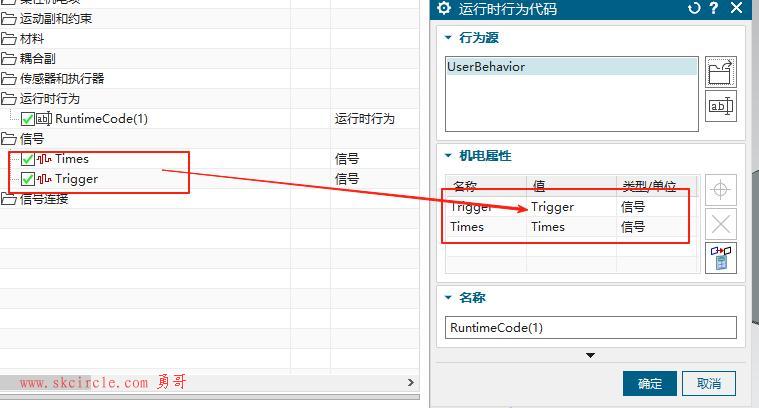
你现在就可以运行仿真了。通过观察面板里查看结果。
你也可以VS下断点联调,需要附加到进程。
选择ugraf这个进程。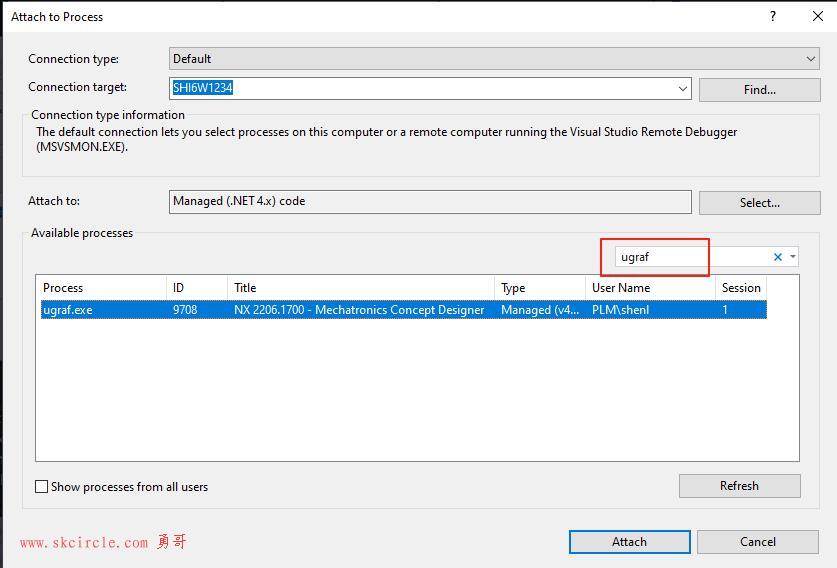
运行仿真,就可以看到断点会断下来了。
本文出自勇哥的网站《少有人走的路》wwww.skcircle.com,转载请注明出处!讨论可扫码加群:

本帖最后由 勇哥,很想停止 于 2025-07-31 14:30:37 编辑 

")
")
常用的6种方法")
 封装运动功能")


:入口函数,运算符,模块与包,py文件 ,基础数据类型,列表")


Qt Widgets Designer界面设计器和界面应用")
:if的bool判断, 变量的作用域范围, 格式字符串, 弹窗, 列表推导式, 一个点歌小程序")