 少有人走的路
* This example program shows you how to use the GMM classifier for novelty
* detection to perform a web inspection task. To perform the novelty detection,
* all pixels belonging to the single trained class are computed, and are then
* subtracted from the classification ROI to extract the erroneous pixels. For
* the web inspection task, the GMM can consequently be used to detect
* textures that do not correspond to the texture of the trained good objects.
*
dev_update_off ()
*
ReadPretrainedClassifier := false
* Uncomment the following line to read the pretrained classifier from
* disk. The training may last up to half a minute.
* ReadPretrainedClassifier := true
SaveClassifier := false
* Uncomment the following line to write the GMM classifier to disk after training.
* SaveClassifier := true
*
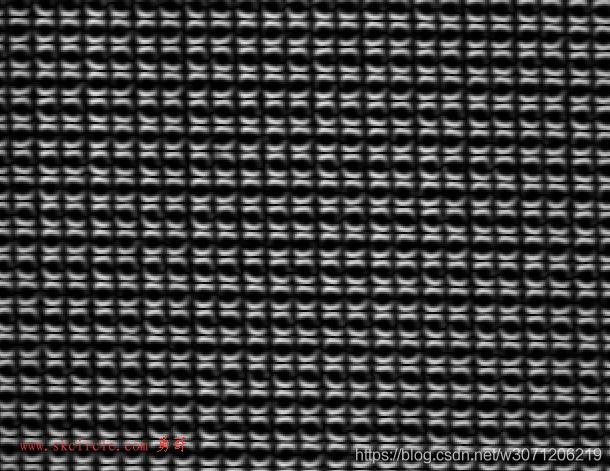
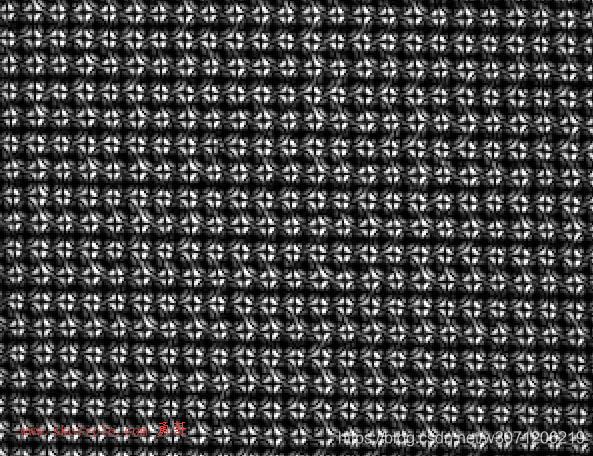
read_image (Image, 'plastic_mesh/plastic_mesh_01')
get_image_size (Image, Width, Height)
dev_close_window ()
dev_open_window (0, 0, Width, Height, 'black', WindowHandle)
dev_set_color ('red')
set_display_font (WindowHandle, 16, 'mono', 'true', 'false')
get_system ('example_dir', HalconExamples)
* The texture filters used for the classification will return artifacts at the image
* borders because the images of the plastic mesh to be inspected do not
* contain an integer number of mesh cells. Because this would lead to wrongly
* detected errors at the image borders, we must exclude the area close to the
* image border from the training and classification. This is done with the following
* rectangle. Note that the image is later scaled down by a factor of two.
gen_rectangle1 (Rectangle, 10, 10, Height / 2 - 11, Width / 2 - 11)
if (ReadPretrainedClassifier)
* Read the pretrained classifier from disk.
dev_display (Image)
disp_message (WindowHandle, 'Reading classifier from disk...', 'window', 10, 10, 'black', 'true')
read_class_gmm (HalconExamples + '/hdevelop/Segmentation/Classification/novelty_detection.gmm', GMMHandle)
wait_seconds (1.5)
else
* Create the GMM classifier.
create_class_gmm (5, 1, [1,5], 'spherical', 'normalization', 5, 42, GMMHandle)
* The training is based on five images that contain no errors.
for J := 1 to 5 by 1
read_image (Image, 'plastic_mesh/plastic_mesh_' + J$'02')
* The images are zoomed down because the resolution of the mesh is very
* high. This saves a large amount of processing time.
zoom_image_factor (Image, ImageZoomed, 0.5, 0.5, 'constant')
dev_display (ImageZoomed)
disp_message (WindowHandle, 'Adding training samples...', 'window', 10, 10, 'black', 'true')
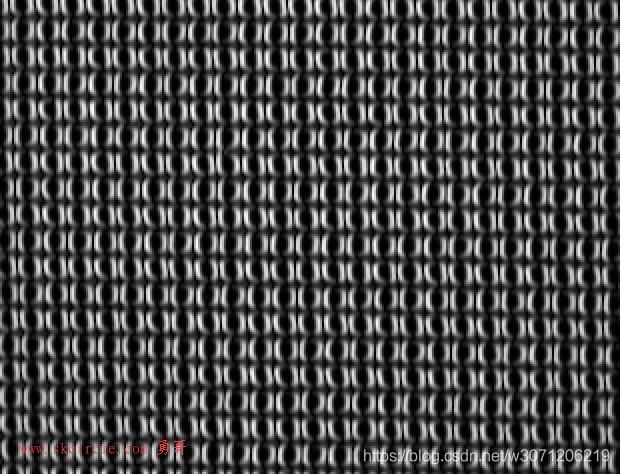
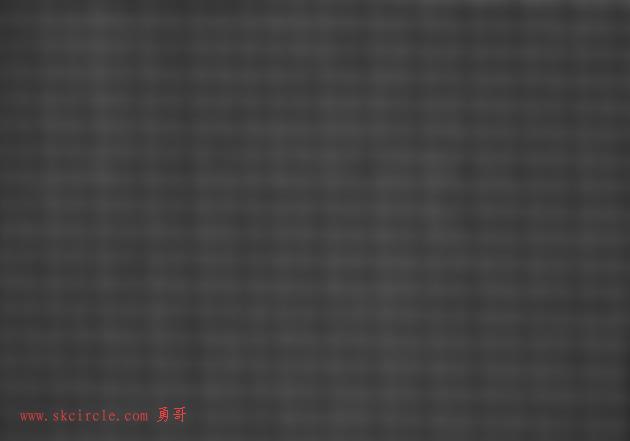
* Generate the texture image.
gen_texture_image (ImageZoomed, ImageTexture)
* Add the samples to the classifier.
add_samples_image_class_gmm (ImageTexture, Rectangle, GMMHandle, 2.0)
endfor
dev_display (ImageZoomed)
disp_message (WindowHandle, 'Training GMM...', 'window', 10, 10, 'black', 'true')
* Train the GMM.
train_class_gmm (GMMHandle, 100, 0.1, 'training', 0.0001, Centers, Iter)
if (SaveClassifier)
write_class_gmm (GMMHandle, HalconExamples + '/hdevelop/Segmentation/Classification/novelty_detection.gmm')
endif
endif
* Now detect errors in the plastic meshes.
dev_set_draw ('margin')
dev_set_line_width (3)
for J := 1 to 14 by 1
read_image (Image, 'plastic_mesh/plastic_mesh_' + J$'02')
zoom_image_factor (Image, ImageZoomed, 0.5, 0.5, 'constant')
dev_display (ImageZoomed)
dev_set_color ('white')
dev_display (Rectangle)
gen_texture_image (ImageZoomed, ImageTexture)
reduce_domain (ImageTexture, Rectangle, ImageTextureReduced)
* Classify samples belonging to the trained class with the GMM.
classify_image_class_gmm (ImageTextureReduced, Correct, GMMHandle, 0.000002)
* Subtract them from the ROI to obtain the texture errors.
difference (Rectangle, Correct, Errors)
* Postprocess the returned raw errors to remove insignificant parts of the
* detected errors.
opening_circle (Errors, ErrorsOpening, 3.5)
closing_circle (ErrorsOpening, ErrorsClosing, 10.5)
connection (ErrorsClosing, ErrorsConnected)
select_shape (ErrorsConnected, FinalErrors, 'area', 'and', 300, 1000000)
count_obj (FinalErrors, NumErrors)
dev_set_color ('red')
dev_display (FinalErrors)
if (NumErrors > 0)
disp_message (WindowHandle, 'Mesh not OK', 'window', 10, 10, 'red', 'true')
else
disp_message (WindowHandle, 'Mesh OK', 'window', 10, 10, 'forest green', 'true')
endif
if (J < 14)
disp_continue_message (WindowHandle, 'black', 'true')
endif
stop ()
endfor本地函数gen_texture_image()
* The texture image is a five-channel image that contains the result of applying
* five different Laws filters, which basically correspond to first and second
* derivatives, and smoothing them sufficiently.
texture_laws (Image, ImageEL, 'el', 5, 5)
texture_laws (Image, ImageLE, 'le', 5, 5)
texture_laws (Image, ImageES, 'es', 1, 5)
texture_laws (Image, ImageSE, 'se', 1, 5)
texture_laws (Image, ImageEE, 'ee', 2, 5)
compose5 (ImageEL, ImageLE, ImageES, ImageSE, ImageEE, ImageLaws)
smooth_image (ImageLaws, ImageTexture, 'gauss', 5)
return ()
GMM分类器进行新颖性检测以执行Web检查任务。 要进行新奇检测,
*计算属于单个训练类的所有像素,然后进行计算从分类ROI中减去以提取错误像素。 对于网络检查任务,GMM因此可用于检测纹理与训练好的物体的纹理不对应。
纹理图像是包含应用结果的五通道图像
五种不同的法律过滤器,基本上对应于第一和第二衍生物,并充分平滑它们。
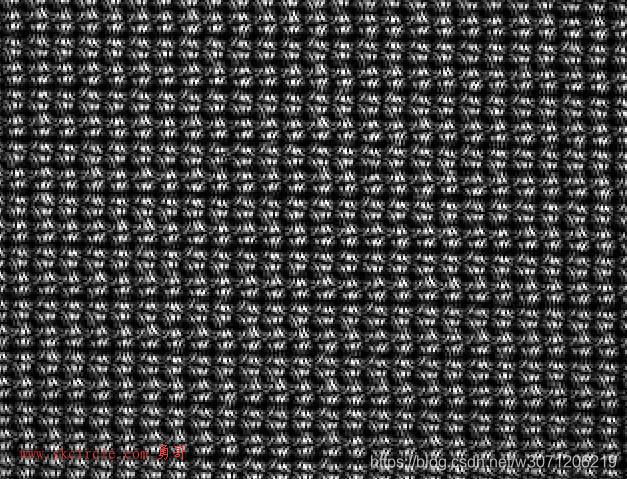
纹理分析是图像处理中的一种典型任务,texture_laws是Halcon中纹理分析的重要算子,其本质原理是利用不同的kernel与图像进行卷积运算,提取出图像的高频部分或低频部分。
纹理(texture)由纹理单元(texel)组成,纹理单元是纹理图像中最小的重复单元,texel是纹理的基本单元。
纹理分析的第一种典型应用是利用纹理滤波器对图像进行滤波处理,以增强(enhance)或抑制(suppress)特定的纹理。滤波后的图像通过blob analysis或者分类算法,将具有相同纹理的部分分割为同一区域(region)。
第二种典型应用是计算图像的纹理特征用于图像的分类,纹理滤波器作为预处理滤波器来增强(enhance)或抑制(suppress)特定的纹理。Halcon中标准的纹理特征(feature)算子是gen_cooc_matrix(生成共生矩阵),另一个常用的算子是entropy_gray(灰度熵,用于计算图像的平均信息量(entropy)和各向异性(anisotropy))。
texture_laws算子的语法如下:
texture_laws(Image : ImageTexture : FilterTypes, Shift, FilterSize : )
Image:原始图像
ImageTexture:经过纹理滤波器滤波后的图像
FilterTypes:滤波器的类型
Shaft:滤波后图像的灰度缩放系数,具体实现公式未知,实际使用过程中降低了滤波后图像的灰度,使得使用不同滤波器类型的滤波后图像具有可比性
FilterSize:滤波器尺寸,可选3,5,7
滤波器类型由滤波向量(vector)的两个字母组成,第一个字母表示在列方向的滤波器向量,第二个字母表示在行方向的滤波器向量。处理过程中,先对图像的一个方向进行滤波(具体从列方向还是行方向开始未知),再对图像的另一个方向进行滤波。
以3x3的滤波器矩阵为例:
l = [ 1 2 1 ],
e = [ -1 0 1 ],
s = [ -1 2 -1 ]
滤波向量l增强滤波方向的图像的亮度。滤波向量e检测了滤波方向上的突变(即边缘,高频区域)。滤波向量s同样检测了滤波方向上的突变(与滤波向量e检测方法不一样)。滤波后图像很容易溢出(这不是个准确说法,实际意义是对于byte类型的图像,灰度值超过了255),因此需设置合适的shaft值缩放灰度值。
一般来说,可以选择滤波向量中的 "l", "e", "s", "r", "w", "o"与滤波向量"l"组合来增强图像的低频部分,或者与滤波向量"o"组合来增强图像的高频部分。
滤波器类型的第二个字母"l", "e", "s", "r", "w", "o"依次检测图像低频部分到高频部分。例如,滤波器"le"检测图像 中相对低频的部分,而滤波器"ls"检测图像中相对高频的部分。
texture_laws (Image, ImageEL, 'el', 5, 5)
texture_laws (Image, ImageLE, 'le', 5, 5)
texture_laws (Image, ImageES, 'es', 1, 5)
texture_laws (Image, ImageSE, 'se', 1, 5)

texture_laws (Image, ImageEE, 'ee', 2, 5)
高斯平滑,过滤高频,剩下低频
smooth_image (ImageLaws, ImageTexture, 'gauss', 5)


")
")
常用的6种方法")
 封装运动功能")


:QWidget,QMainWindow")


Qt Widgets Designer界面设计器和界面应用")
:if的bool判断, 变量的作用域范围, 格式字符串, 弹窗, 列表推导式, 一个点歌小程序")